


An author website is one of the most important online spaces an indie author can have. It gives readers a single place to learn about you, discover your books, subscribe to your newsletter, and find your buy links.
It does not have to be complicated or expensive. A simple website with clear navigation and the right sections can already work well for your author brand. So, what should an indie author’s website include? Let’s break it down.
Sections every indie author website should have
Before adding fancy extras, make sure your author website covers the basics. These sections help readers understand who you are, discover your books, and contact you without confusion.
1. Homepage
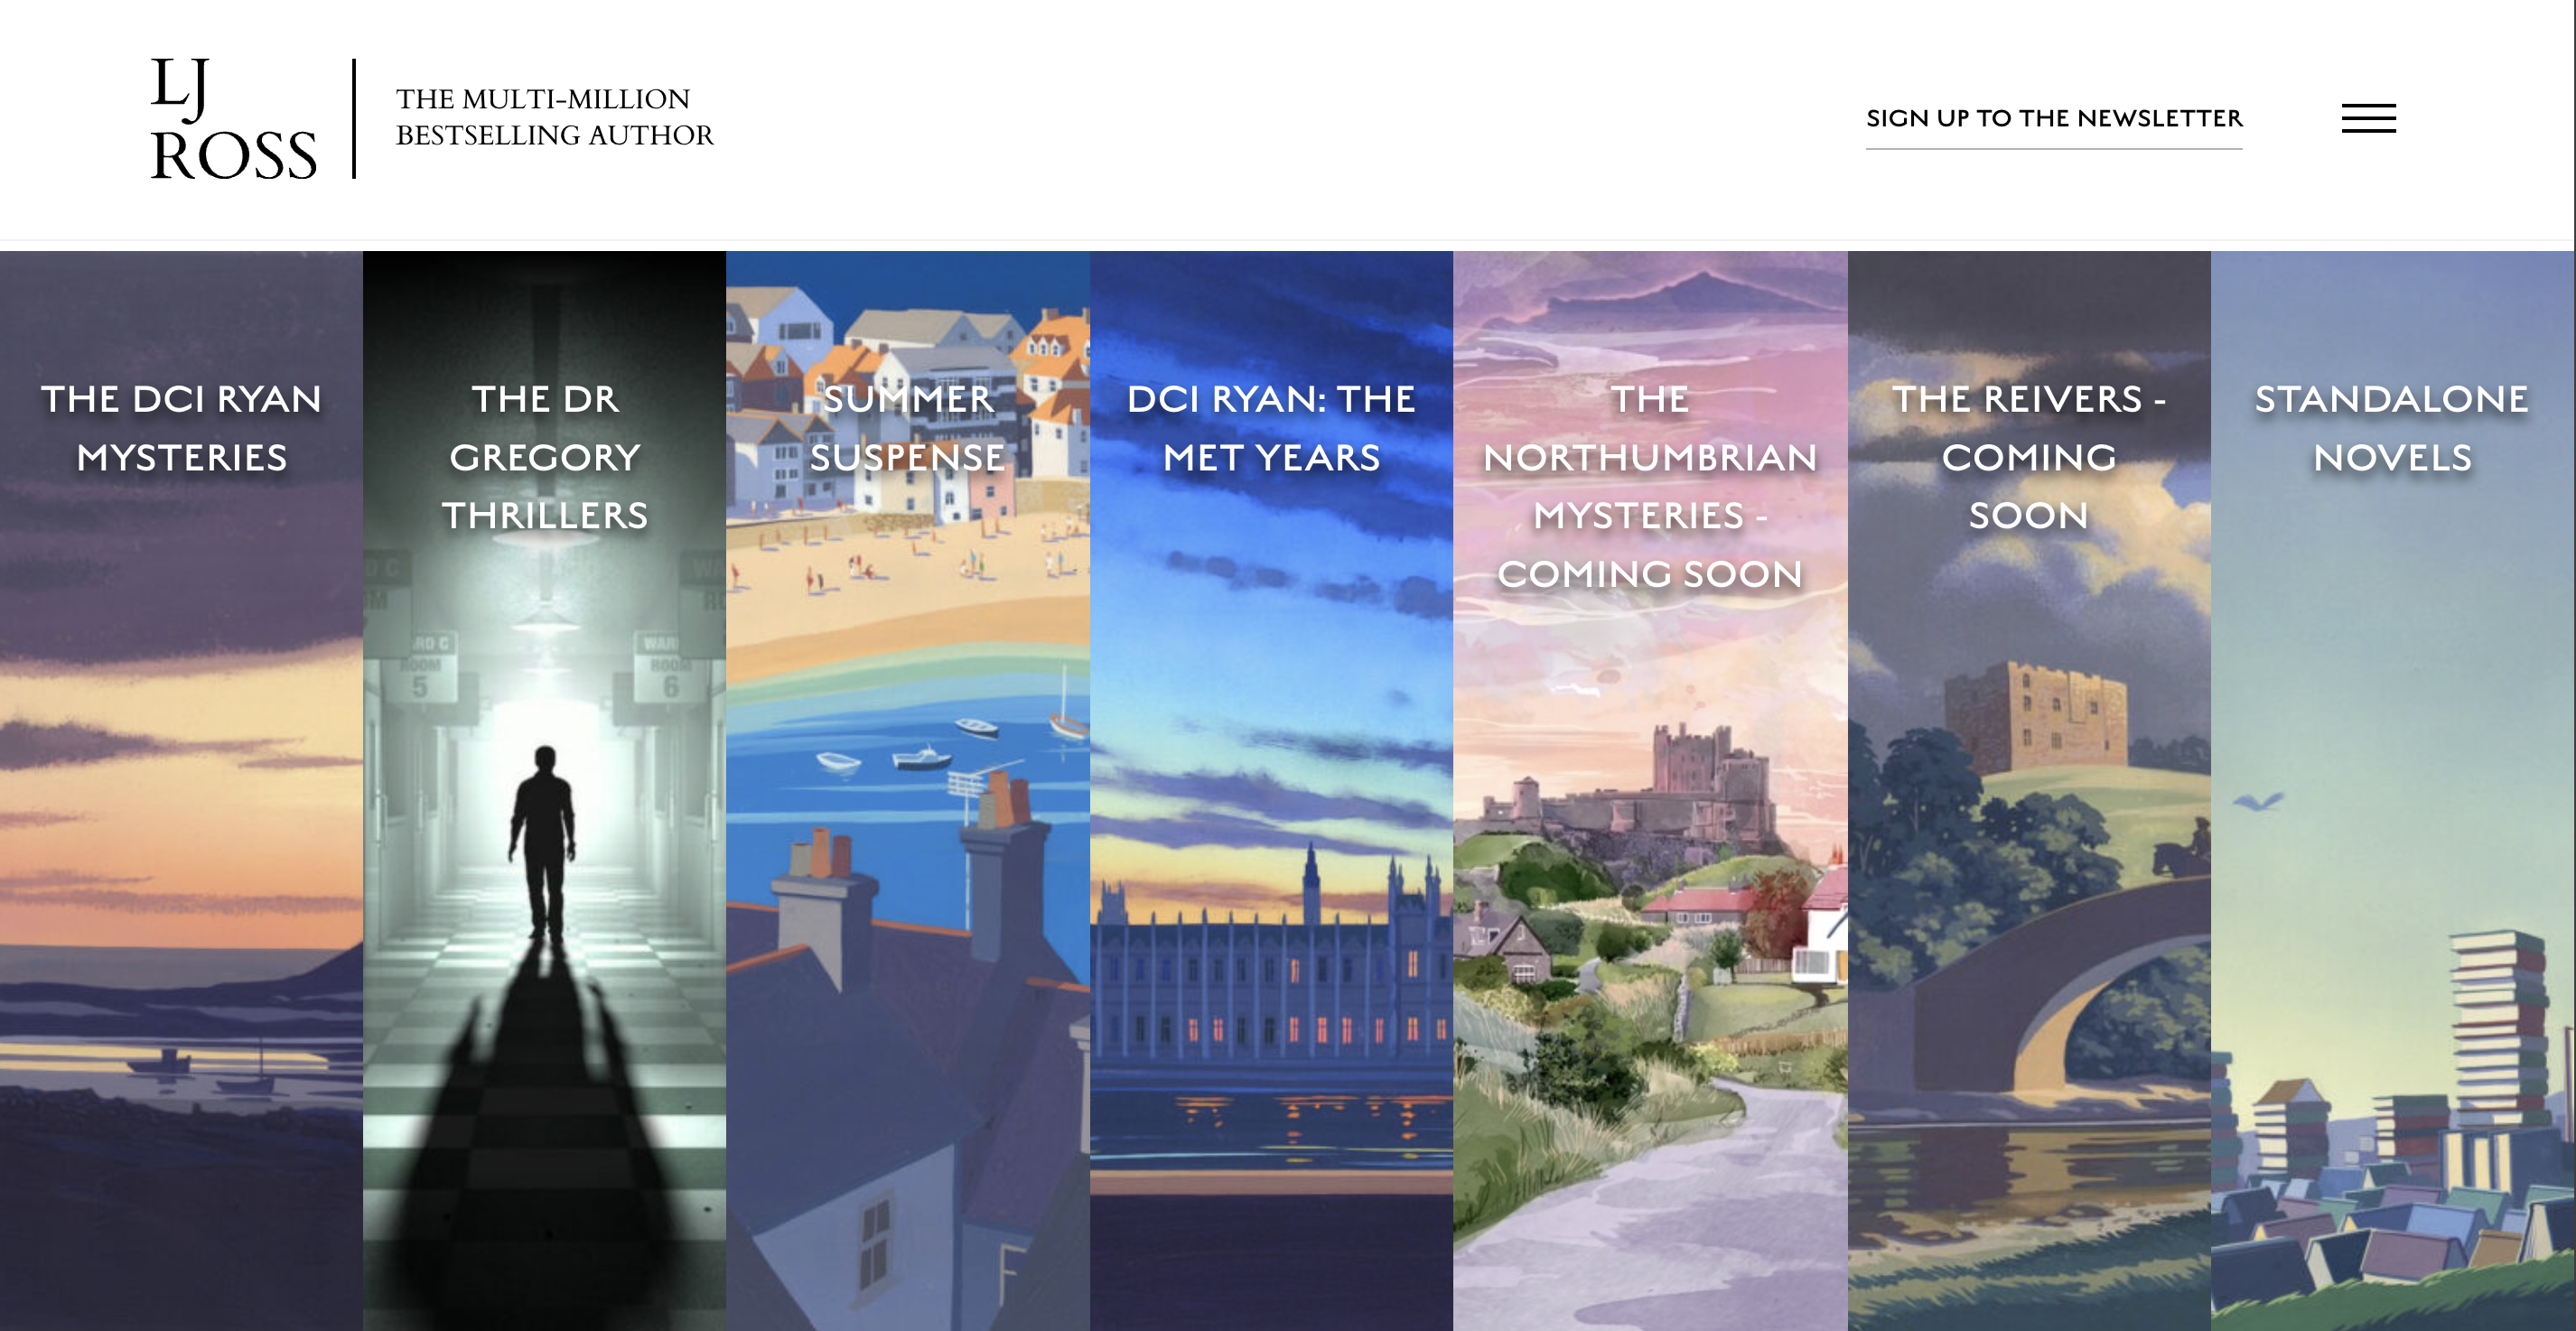
You can include your author name, a short tagline, your featured book, a newsletter sign-up, and clear buttons leading to your books or About page.
For example, instead of simply writing “Welcome to my website,” you can make the homepage more specific: “Dark fantasy, dangerous secrets, and morally gray heroes,” or “Romance novels for readers who love slow burn, sharp banter, and emotional chaos.”
Your homepage should not try to tell everything at once. Think of it as a starting point that gently guides readers deeper into your world. The goal is simple: help visitors understand your author brand in a few seconds.
2. About the Author
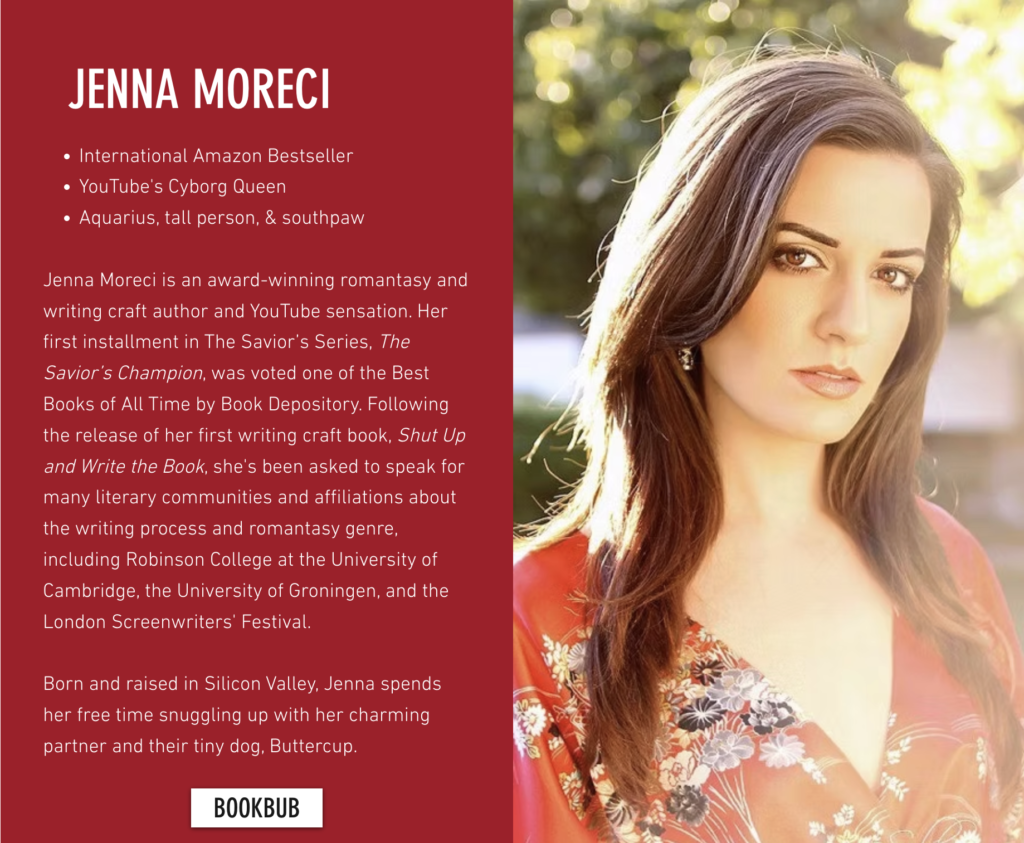
Readers often want to know the person behind the books. Your About page gives them a chance to connect with you beyond your stories.
You can include a short author bio, your genre, your writing style, a few personal details, and an author photo. It does not have to be too long or overly formal. Try to balance personality and professionalism. Readers do not need your full life story, but they often enjoy small details that make you memorable.
3. Books
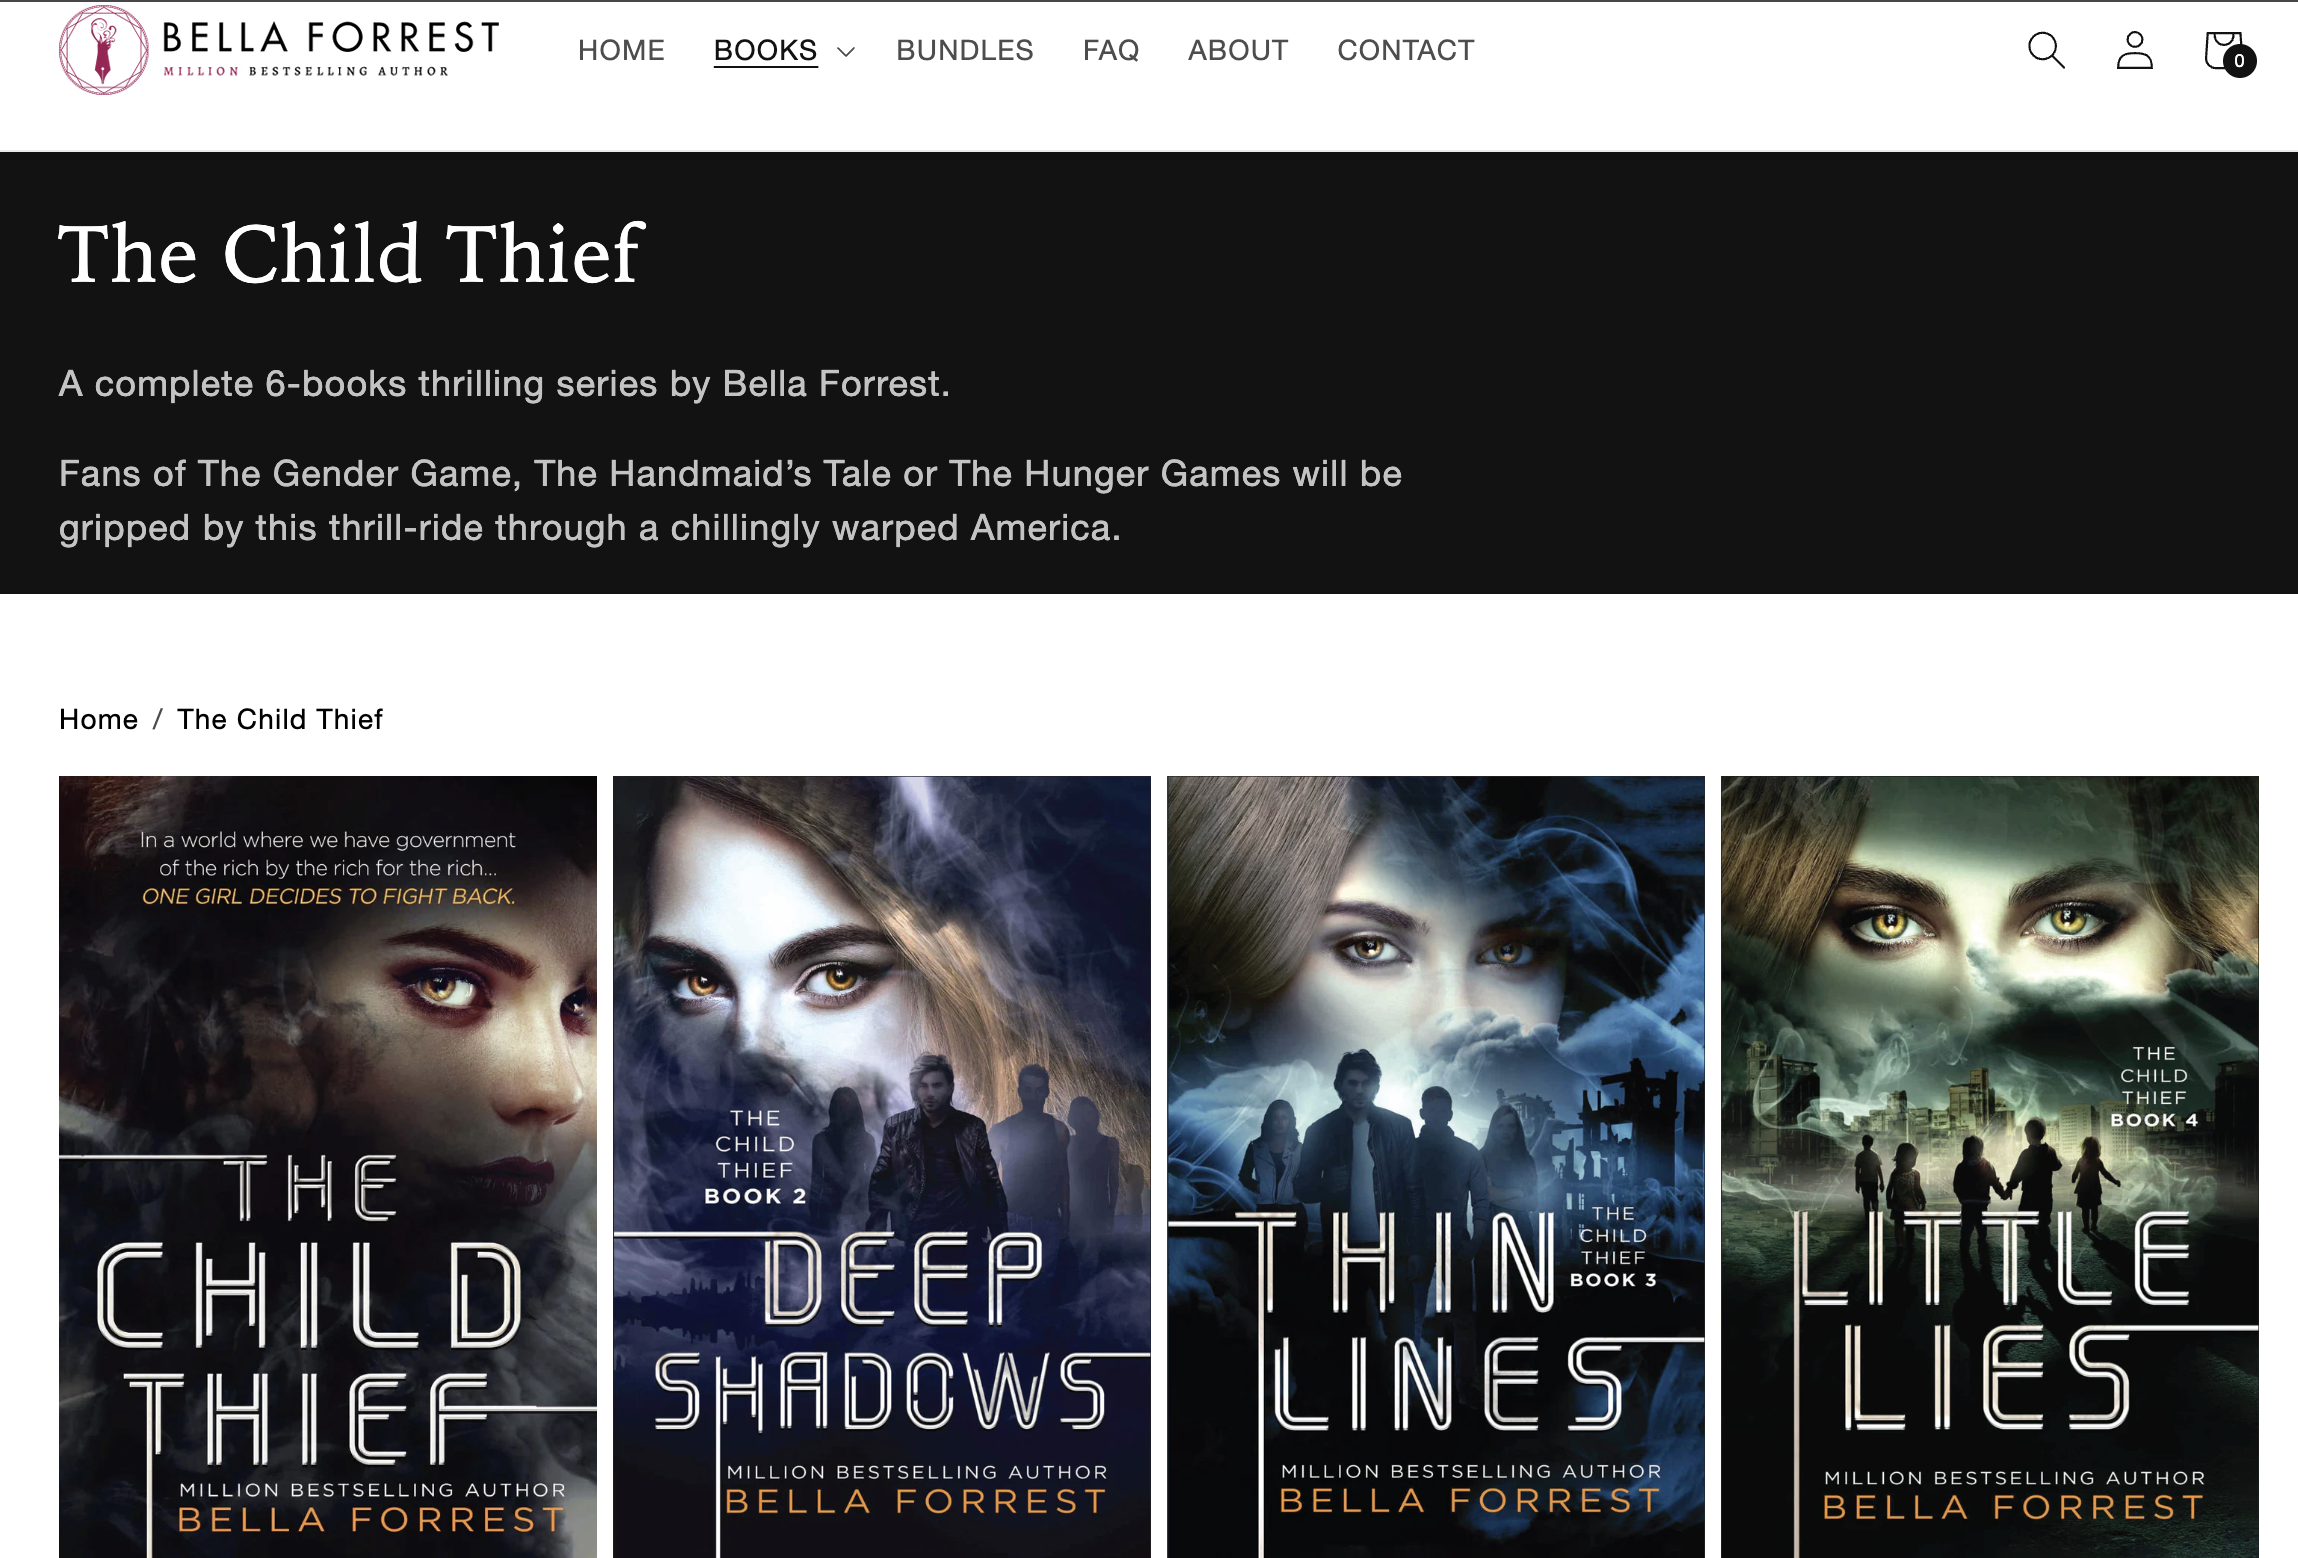
Your Books page is one of the most important parts of your website. This is where readers can discover what you have published and decide what to read next.
For each book, add:
- Book cover
- Title and subtitle
- Series name, if applicable
- Genre
- Short book description
- Buy links
If you have several books, organize them clearly. You can divide them by series, genre, or publication order. For a series, it is especially useful to show the reading order. Many readers want to know where to start, and if they feel confused, they may leave without buying anything.
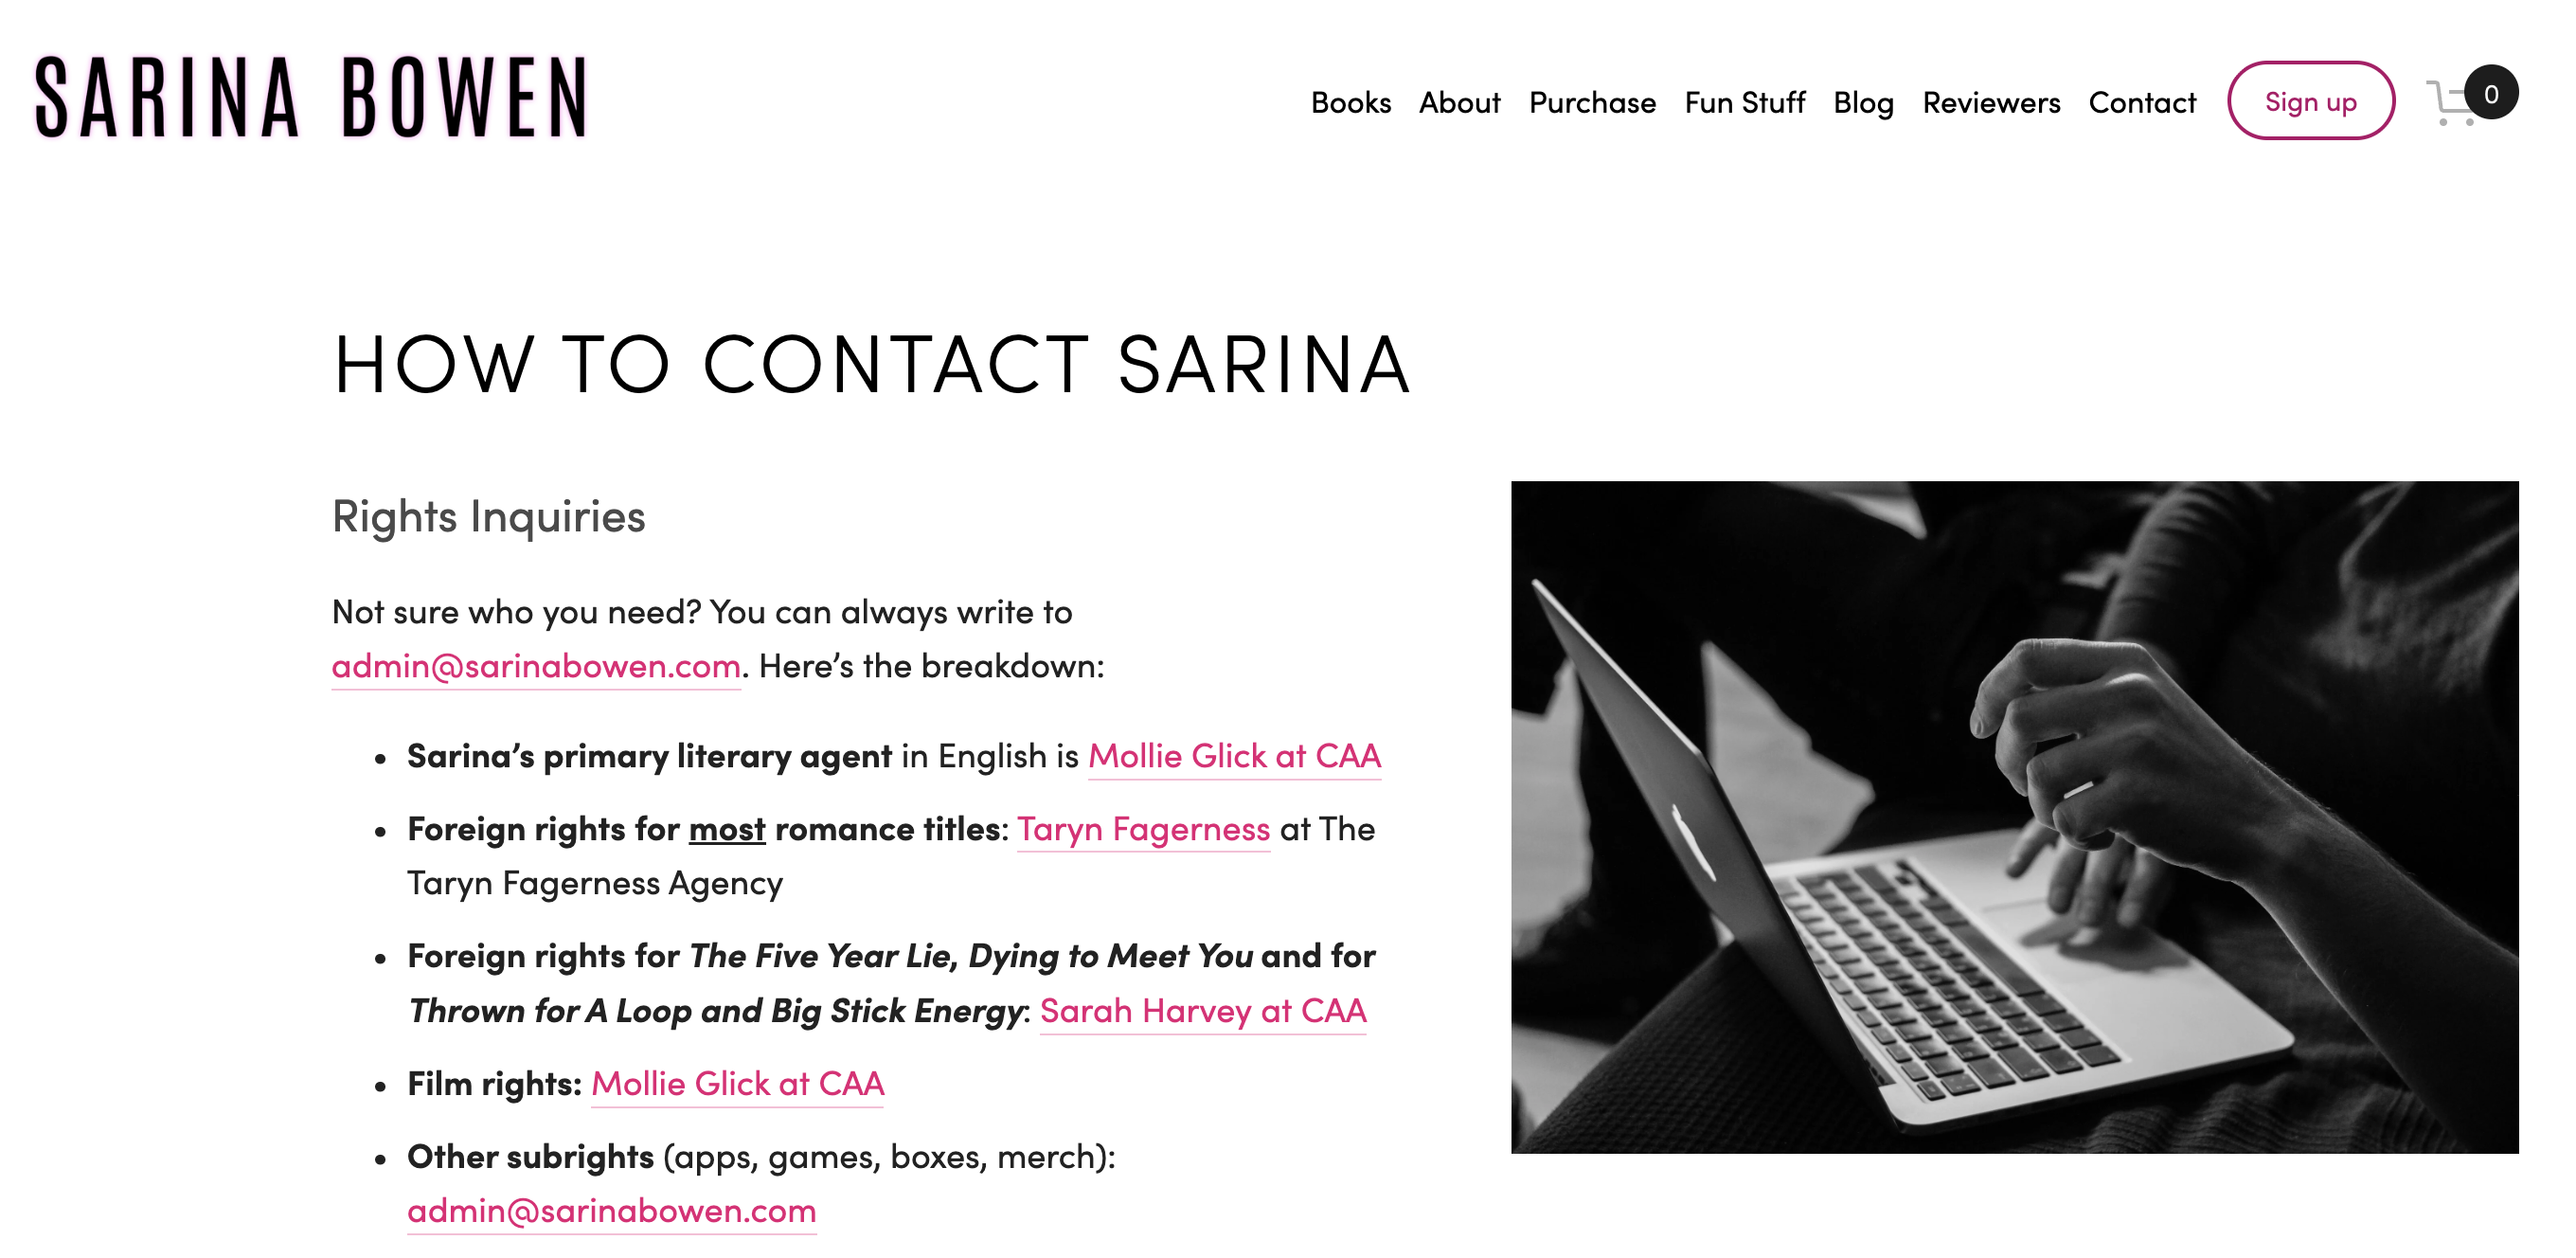
4. Contacts
A Contact page makes your website look more professional and helps people reach you easily. You can add a contact form, professional email address, social media links, or a short note explaining what people can contact you about.
If you do not want to share your personal email publicly, use a contact form or create a separate author email address.
5. Newsletter sign-up
An email list helps you stay connected with readers without depending fully on social media algorithms. You can use it to share release news, cover reveals, bonus content, discounts, events, or personal updates.
When adding a sign-up section, instead of just saying “Subscribe to my newsletter,” make the offer more inviting: “Join my reader list and get exclusive updates, bonus scenes, and early cover reveals.”
If you’re looking for ways to grow your email list, check out our blog post.

Additional sections you can add to make your author website stronger
Once the essential pages are ready, you can add more sections depending on your goals. These are not always necessary, especially if you are creating your first author website, but they can make your site more useful, engaging, and professional.
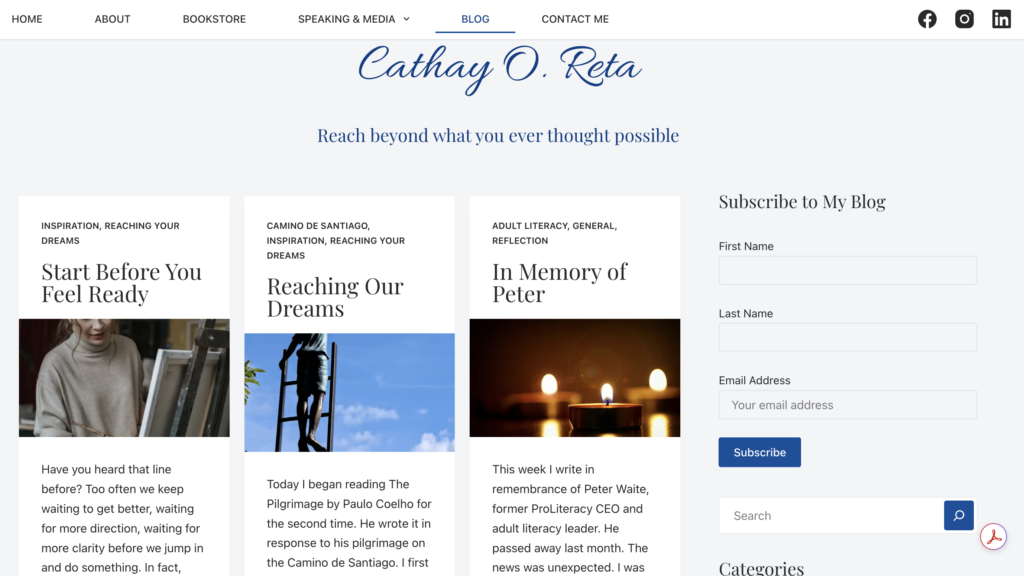
1. Blog or News section
A blog is not required for every author, but it can be a great tool if you enjoy sharing updates or extra content. You can use it for writing updates, behind-the-scenes posts, world-building notes, reading lists, cover reveals, release announcements, event news, or personal reflections.
2. Media Kit or Press Page
A media kit is useful if you want to work with bloggers, journalists, podcasters, bookstores, libraries, or event organizers.
You can include:
- Longer author bio
- Author photo
- Book covers
- Book descriptions
- Self-publishing information
- Contact details
- Interview topics
- Social media links
- Downloadable press materials
This section makes it easier for people to feature you or your books without having to request every detail separately.

3. Reviews and praise
If your books have strong reviews, testimonials, or praise from readers, bloggers, or other authors, you can highlight them on your website. Short review quotes can build trust and help new visitors feel more confident about checking out your books.
Discover more ways to get book reviews in our blog post.
4. Events
If you attend book fairs, signings, online panels, conventions, webinars, podcast interviews, or live readings, an Events page can be a great addition. It helps readers know where they can meet you or hear you speak. You can include upcoming events, registration links, locations, dates, and photos from past events.
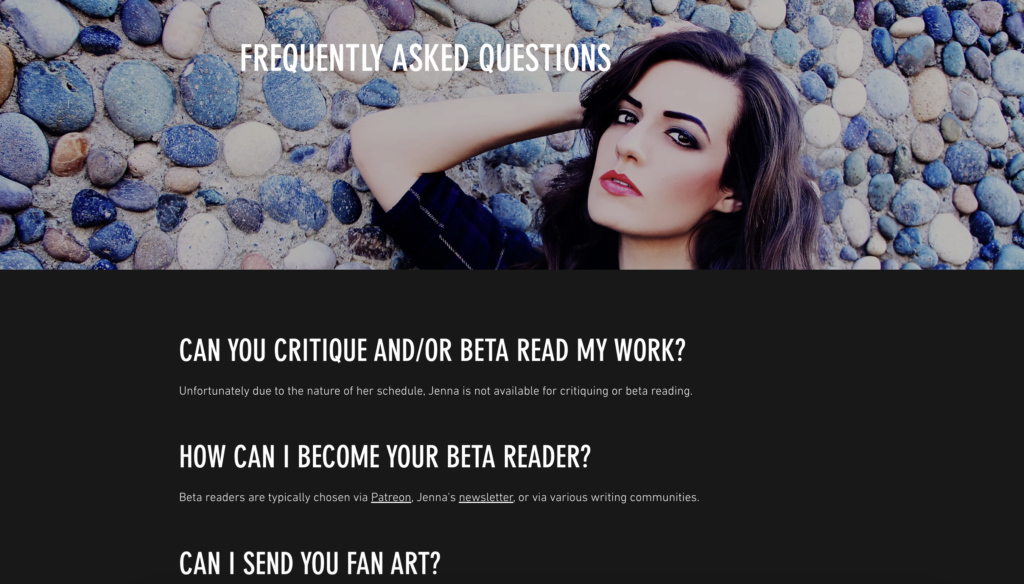
5. FAQ
An FAQ section can answer common questions before readers even need to ask. You can include information about:
- Reading order
- Signed copies
- Bonus content
- Translations
- Audiobooks
- Whether your books are connected
This is especially useful if you write series, have multiple formats, or often receive the same questions from readers.
6. Shop
A shop section is useful if you sell books or merch directly. You can offer signed paperbacks, special editions, bookmarks, stickers, art prints, book boxes, or digital extras. However, not every author needs a shop right away. It makes the most sense if you already have products to sell directly or an audience interested in exclusive items.
7. Bonus content
Bonus content can make your website more exciting for loyal readers. You can add deleted scenes, character art, playlists, maps, reading guides, wallpapers, discussion questions, or exclusive extras for newsletter subscribers.
Extra tips for creating an author website
Before you start building, think about your author brand. Your website should match the mood of your books. A cozy mystery author and a dark fantasy author probably should not have the same visual style. By the way, you can also use your author logo as a favicon, so your website looks more branded and recognizable even in a browser tab.
Pay attention to your colors, typography, cover images, tone of voice, page structure, calls to action, and mobile version. All these elements shape how readers perceive you as an author.
Most visitors will probably view your website on their phone, so make sure everything looks good on mobile. Your book covers, buttons, text, and menu should be easy to read and use on a small screen.
Finally, keep your website updated. If you release a new book, change your bio, create a new reader magnet, or launch a preorder, your website should reflect that. An outdated website can make readers wonder if you are still active.
Where indie authors can build a website
You do not have to code your website from scratch. Many website builders let you create a professional-looking author site with templates and simple editing tools.
- Wix — A flexible website builder with many templates and a visual editor. Good for authors who want more design freedom.
- Squarespace — A stylish option with clean, polished templates. Great for authors who want a professional-looking website without spending too much time on design.
- WordPress — A strong choice for authors who plan to blog, share updates, or grow a content-rich website over time.
- Carrd — A simple option for one-page websites. Good for debut authors or anyone who needs a quick author landing page with a bio, book links, newsletter form, and social media.
To wrap up
An indie author website does not have to be big or complicated to be useful. Start with the essential sections, make the navigation clear, and add extra pages when they support your goals. Your website should help readers discover your books, understand your author brand, and stay connected with you.
Do you already have an author website? What sections does it include, and which ones are you thinking of adding next? Share your experience in the comments.


